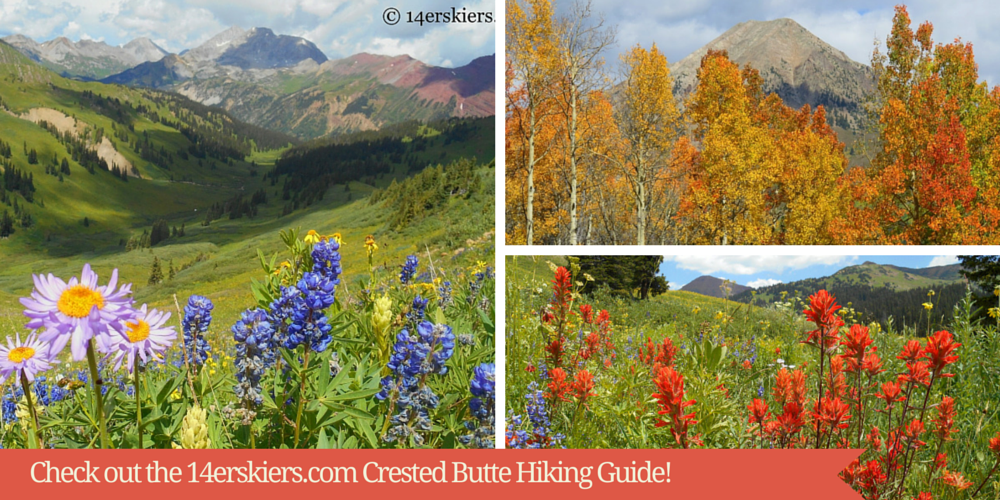
Welcome to the Crested Butte hiking guide- your most comprehensive guide to hiking in Crested Butte, Colorado. Most trails mentioned are trails where there are few bikers or biking is not allowed (for example, bikes are not allowed in Wilderness areas). I have included several trails, but not all. If a trail is not listed, then I haven’t hiked it yet, OR it is popular enough with bikers that I have chosen not to list it as a hike. In general, I have been listing trails that we at 14erskiers don’t do on a bike. However, some biking trails make great hiking trails. You may also seek some information on our Crested Butte Mountain Bike Guide.
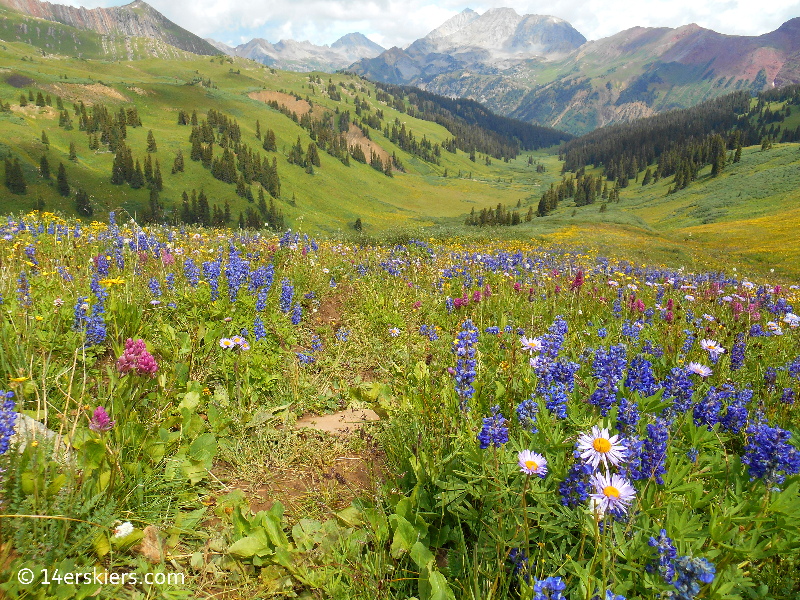
View of from Hasley Pass.
As is true of most things on the internet, this page is a work in progress. I am continuously editing existing hikes and adding new hikes. Please do not hesitate to contact me should you find errors on this page or if you have any questions.
Table of Contents
This is a list of links to help you fast-forward you to the content you desire to find, all listed below.
The hikes below are organized by location. I have hiked most of the trails mentioned and have gathered statistics using either the My Tracks program on my Android phone, using maps, or using Google Maps or Google Earth. Some sources showed varying information, but I have used my best judgement. Elevation gain includes not just the difference in low point to high point, but all the little ups and downs in between.
I have included hiking times, though these times will of course vary from person to person and group to group. I typically hike somewhere between 2.5 and 3 miles for in an hour on average. I don’t run on my hikes. Some hikes are slower than others due to rocky terrain. But, some of the variation in my times is just due to how I was feeling on the day I did the hike and whether I was hiking with another person (I often hike faster solo). The hiking times include short stops.
A Note about Trail Conditions
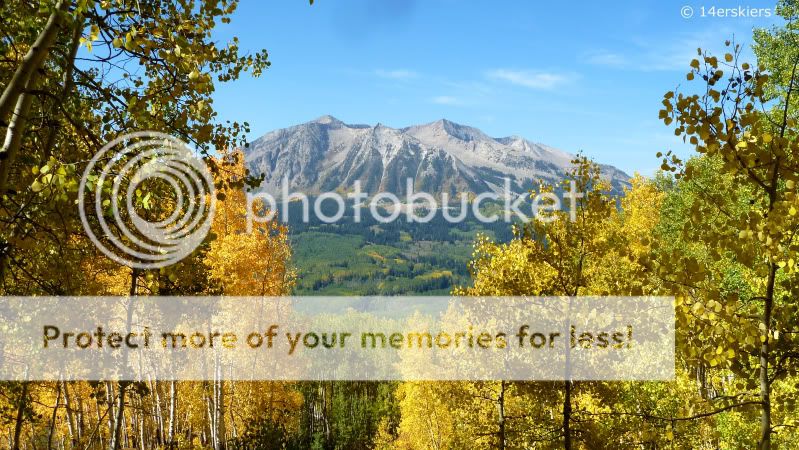
Kebler Pass is most beautiful in fall.
Please keep in mind that the condition of trails will change according to the season. Some higher elevation trails may not be reasonably accessible in June or even into early July due to snow. Also, these same higher elevation trails can be very wet in early summer due to the melting snow. It is always best, especially in late spring or early summer, to check the conditions. Try calling the Alpineer or CB Sports. Additionally, you can check out trail conditions from Maroon Shuttles. Or, you can even contact us at 14erskiers.
If you have any questions about any of the trails in the Crested Butte area, please do not hesitate to contact me.
Note about Map Files
For many of the routes, I have tried to include maps and files to help in navigation. There are many different formats. If you are having trouble viewing a particular format, follow the instructions below. Note: The GPX and KMZ files tend to be more accurate that the Google Map files. But, both are very useful.
1) Google Map -The maps are usually liked to a Google Map URL which anyone with Internet can access. All you need to do is simply click on the map link.
2) Images – Click on the link to view the map as an image. You can use your browser to help zoom in.
3) GPX Files – These are more complicated. Simply clicking on the link won’t work. Instead, save the file to your computer (on a PC, this means right-click on your mouse and “Save As”). Then, open using most GPS software OR Google Earth. In order to open the GPX file using Google Earth, you must have the Google Earth software installed on your computer. Open Google Earth. Then, under File, go to Open, and then open the GPX file that you just downloaded onto your computer.
3) Google Earth Files – Like the GPX files, these are more complicated. They appear as KMZ files. They can ONLY be viewed using Google Earth, as far as I know. Simply clicking on the link won’t work. Instead, save the file to your computer (on a PC, this means right-click on your mouse and “Save As”). Then, open using Google Earth. In order to open the KMZ file using Google Earth, you must have the Google Earth software installed on your computer. Open Google Earth. Then, under File, go to Open, and then open the KMZ file that you just downloaded onto your computer.
One final note– This guide took a tremendous amount of work to put together. If you find it useful, please consider purchasing an item through one of our affiliates or contributing a small donation to us through paypal, using the button at right. Thanks!
[polldaddy poll=8163736]
Kebler/Ohio Pass Area Hikes
Trailhead Info
1) The “Y” – A common reference point. The Y is a split in the Kebler Pass road that is roughly 6.3 miles from the town of Crested Butte. Taking the right turn heads toward the Irwin area. Going straight, you will head toward Kebler or Ohio Pass.
2) Ohio Pass – the turn for Ohio pass is about a half mile past the Y. The left fork in the road goes over Ohio Pass, a dirt road. Continuing on the paved road will take you over Kebler Pass.
3) Horse Ranch Park – On Kebler Pass road, about 5.5 miles past the Y.
Storm Pass
Miles, Time, & Vertical Elevation Gain: just under 16 miles, 7,4000 ft Benefits: Mountain Views, Fall Colors Description: This trail is one of the most spectacular in the Ohio Pass area. It is scenic from beginning to end, and worth hiking even just for the first few miles. The lower part of the trail takes hikers through one of the most scenic valleys I have ever seen, and the upper part boasts scenic miles above treeline. From Storm Pass, you can look down on the beautiful Castle rock formations. Storm Pass can be done as an out and back, or looped into other trails (best for a multi-day trip). Steepness of the trail varies throughout. Some parts are virtually flat while others are relatively steep Route:From the trailhead, follow signs for 450/Mill Castle Trail. Generally the trail is easy to follow, although you may see a few smaller unmarked trails that shoot off of the main trial. Just stay on the main trail. Around mile 7 there will be a fork in the trail, turn right following the signs to Storm Pass. It is about 8 miles total to the top of Storm Pass. The last mile or two are all above treeline. Return via the ascent route. Trailhead: Mill Creek – From the Ohio Pass turn off from Kebler, travel about 11.75 miles to the Mill Creek Road. Turn right onto the road and travel about another 3 miles to the trailhead. The Mill Creek road gets increasingly rough, but cars with slightly higher clearance will have no trouble (ex. Subarus). Trip Reports:October 2012 Maps:Google Map, GPX File
Swampy Pass
Miles, Time, & Vertical Elevation Gain: 12 miles, 4 hr 50 min, 2100 ft Benefits: Fall Colors Description: This trail is not very steep and keeps a fairly consistent grade throughout. It provides occasional spectacular views of the Castles and the Anthracites mountains. It can be done as an out-and-back or a loop with other trails. Route: From the trailhead, follow signs for 439 and Swampy Pass. The trail is well marked and well-used. Eventually the trail intersects with 438. To see great views of the Anthracites, turn left onto 438 and continue about a half a mile to a large meadow. Return via the ascent route. Trailhead: Swampy Pass – From the Ohio Pass turn off from Kebler, travel about 5 miles to the trail head. Trip Reports:July 2012 Maps:Google Map, GPX File
Pass Creek
Miles, Time, & Vertical Elevation Gain: As an out and back: 9.5 miles, 4 hr, 1700 ft Benefits: Fall Hike, Mountain Views Description: Similar to Swampy Pass, this trail is not very steep, except in a few short places. It provides occasional spectacular views of the Castles and the Anthracites mountains, perhaps even more so than than Swampy. It can be done as an out-and-back, or as a short or long loop with Swampy Pass. Route: From the trailhead, follow signs for 439 and Swampy Pass. After about .8 miles, the trail splits. Take the left path marked as Pass Creek. Curiously, this trail is not marked on recent Latitude 40 maps. Continue following this trail and it will merge with 563 which is on the map. After about 3 miles, the trail has another intersection. To do the short loop (which is about 5-6 miles total) turn right toward Swampy Pass trail. Otherwise, keep going straight. After a couple more miles, the trail opens up to a meadow, providing excellent views of the Castles. For out-and-back hikers, this is a great stopping point. For those wish to continue on a long loop with Swampy Pass, proceed about .5 to .25 miles further to the intersection with 438. Turn left (north) onto 438 and continue to the intersection with Swampy Pass trail and turn left (east) again to head back to the trailhead. The long loop is about 13 miles. Trailhead: Swampy Pass – From the Ohio Pass turn off from Kebler, travel about 5 miles to the trail head. Trip Reports:Sept 2012 Maps:Google Map, GPX File
Carbon Trail
Miles, Time, & Vertical Elevation Gain: As an out and back: 8 miles, 3.5 hr, 1700 ft Benefits: Fall Hike, Mountain Views Description: Carbon Creek is a little less known and a little more hidden compared to the surrounding trails. At the beginning, the trail has good views of the Castles and Anthracites. Near the end, it accesses the backside of Whetsone. Route: From the trailhead, continue following the Carbon Trail, trail 436. At the intersection with Para Me y Para Te (also known as the Don Cook Trail), turn around and retrace your tracks back to the trailhead. Obviously,this trail can be shortened by turning around at an earlier point. Trailhead: About 1/2 mile after the Y, take a left onto Ohio Pass Road. Travel another 3.4 miles to a large rightward switchback in the road. The road to the trailhead is a very sharp left turn at this switchback. It is such a sharp turn, that you may need to go past it and turn around further down the road. This road to the trailhead is an old railroad grade that is .6 miles long. It gets rougher as you travel. Park at the beginning of the road, or further up if your vehicle allows. Trip Reports:Sept 2014 Maps: None at this time
Three Lakes Trail
Miles, Time, & Vertical Elevation Gain: 4.5 miles, 1 hr 55 min, 767 feet Benefits: Fall Colors, Lake Views Description: This trail has very few steep sections. It winds through the forest, visiting three different lakes, with occasional views of the Raggeds, in a nice loop. Route: From the trail head, follow the signs for trail 842. After about a half mile, there will be an intersection. Follow the path to the right, taking the Three Lakes trail 843. This will take you in a clockwise loop ending in the campground. Follow the road back to the parking lot. This trail can easily be connected with a Beckwith Pass out-and-back. Trailhead: Beckwith Horse Trailhead, near Lost Lake Campground. If you park in the campground, you will need to pay a fee. To get to the Lost Lake campground, go about 4.5 miles past Horse Ranch Park and turn left (south) at a sign for the campground. You will continue 2 miles up the dirt road to the horse trailhead. The horse trailhead is just before the campground, but right after a cattle guard. Trip Reports:July 2012, Sept 2014 Maps:Google Map, GPX File
Beckwith Pass via 842
Miles, Time, & Vertical Elevation Gain: 8 miles, 2 hrs 45 min, 920 feet Benefits: Fall Colors, Wildflowers, Mountain Views Description: This trail is also low grade and not steep, except for a few places near the top. It winds through nice aspen forests at the beginning and as it gains elevation, high alpine meadows allow for fantastic views of the surrounding mountains. Signs mark the top of Beckwith Pass. Route: From the trail head, follow signs for 842. After about a half mile, there will be a split in the trail. Take the left path, following the signs toward Beckwith Pass. The trail first drops in elevation before gaining again. After a couple more miles, there is another split in the trail, where the trail meets with the Cliff Creek Trail. The sign has recently fallen down at this split. The path to the left is 840 and goes to Horse Ranch. The path to the right takes you to Beckwith Pass. Return via the ascent route. Trailhead: Beckwith Horse Trailhead – see Three Lakes Trip Reports:July 2012 Maps:Google Map, GPX File
Beckwith Pass / Three Lakes Combo
Miles, Time, & Vertical Elevation Gain: 11.5 miles, 4 hrs 30 min, 1650 feet Benefits: Fall Colors, Wildflowers, Mountain Views, Lake Views Description: See Beckwith Pass and Three Lakes descriptions Route: I have not done this hike in one shot, but I’ve done both parts. From the trail head, follow the signs for 842 toward Beckwith Pass. After a half mile, the path will split. Follow the left path, taking 842 to Beckwith Pass. After reaching the Pass, return via the ascent route until the split mentioned at the beginning of the trail (1/2 mile in). At this split, follow the signs for the Three Lakes trail 843. This will continue in the clockwise loop ending at the campground. Follow the road back to the parking lot. Trailhead: Beckwith Horse Trailhead – see Three Lakes Trip Reports: See Beckwith Pass via 842 and Three Lakes Maps: See Beckwith Pass and Three Lakes Maps
Beckwith Pass via Cliff Creek 840
Miles, Time, & Vertical Elevation Gain: 5 miles, 2 hrs 15 min, 1400 feet Benefits: Wildflowers, Mountain Views Description: It’s easy to compare 840 with 830 as both lead to the same pass. This trail is fairly steep at times, especially compared to 830, but is a mile shorter. The views of East Beckwith Mountain are more obscure on 840, but highly visible on 830. It’s a good hike, but personally, I think 830 is better. But 840 is about a 15 minute shorter drive from Crested Butte than 830. Route: Follow the signs for Cliff Creek Trail 840 toward Beckwith Pass. After a couple of miles, you will see a split. Follow the straight path, which ascends to the pass. The right path is 842 and will descend to Lost Lake Campground. This intersection may not be well marked. The top of Beckwith Pass is well marked. Return via the ascent route. Trailhead: Horse Ranch Park – located 5.5 miles after the Y on Kebler Pass road. The Horse Ranch parking will be on the right (north) but the trail will be on the left of the road (south). You can park at Horse Ranch, or proceed 1/4 of a mile further to another road on the left side (south). A sign will indicate Cliff Creek Trail 840. Turn left onto this road and park in one of the camping areas. Trip Reports:August 2012, July 2014 Maps:Image, Google Earth File, Google Map – Includes a short jaunt to the area above the pass for scenic views.
Beckwith Bench Trail
Miles, Time, & Vertical Elevation Gain: 9 miles, 4 hrs, 2000 feet Benefits: Wildflowers, Mountain Views Description: The Beckwith Bench Trail is accessed from the top of Beckwith Pass and is a great addition to the Cliff Creek Trail hike. The views of the West Elk Wilderness here are amazing. Route: Follow the signs for Cliff Creek Trail 840 toward Beckwith Pass. After a couple of miles, you will see a split. Follow the straight path, which ascends to the pass. The top of Beckwith Pass is well marked and is at the Wilderness Boundary. Cross into Wilderness and immediately there is another split. The right split leading upwards is the Beckwith Bench Trail. The trail traverses for a while, and then begins to descend sharply. If you descend directly to a swampy area, then you have likely missed a right turn in the trial. Head back up a minute or so and you will find this turn, now on your left. The trail eventually fades out. Return via your ascent route. Trailhead: See directions for the Cliff Creek Trail Trip Reports:August 2014, July 2015 Maps:GPX File, Google Earth File, Google Map – Does not complete trail. Ends at swampy area .5 to .75 miles from the end of the trail.
Swampy Pass to Beckwith Pass to Horse Ranch
Miles, Time, & Vertical Elevation Gain: 11.5 miles, 4 hrs 30 minutes, 2300 feet Benefits: Fall Colors, Wildflowers, Mountain Views Description: See Swampy Pass and Beckwith Pass via Cliff Creek 840 Route: This is best done as a shuttle between Swampy Pass and Horse Ranch. Begin at the Swampy Pass trail head and follow the signs for 439 toward Swampy Pass. After about 6 miles, there will be an intersection. Take the right path, following 838 a couple of miles to the top of Beckwith Pass. Continue down trail Cliff Creek Trail 840 to Horse Ranch. Trailhead: Most people will want to set up a shuttle, leaving one car at Horse Ranch and taking the other to the Swampy Pass trailhead to start. See Swampy Pass and Beckwith Pass via 840 for trailhead info Trip Reports:August 2014 Maps:GPX File, Google Earth File, Google Map
Dyke Trail to Dark Canyon Loop
Miles, Time, & Vertical Elevation Gain: 6.5 miles, 2 hrs 30 minutes, 1700 feet Benefits: Fall Colors, Mountain Views Description: A fairly short loop and the most scenic hike in the Horse Ranch area, with absolutely spectacular views of the Raggeds and Marcellina. This loop is well worth the hike, especially in the fall! The loop climbs up and down throughout, with some steep sections, especially descending. But, the steep sections don’t last long. Route: From Horse Ranch Park, hike up the Dyke for 1.3 miles. At the sign pointing toward the Raggeds Wilderness, turn left onto Irwin Trail. Follow this 1.2 miles until the intersection of Oh-Be-Joyful Pass trail. Turn left again, and travel 0.6 miles until the Dark Canyon Trail and make another left. Here, the trail flattens out. Look for some overlooks just off the right side of the trail. They are worth the stop. Follow Dark Canyon all the way back to Horse Ranch. Trailhead: Horse Ranch Park, see above. Trip Reports:September 2012 Maps:Google Map, GPX Track
Dark Canyon Trail
Miles, Time, & Vertical Elevation Gain: One way: 14.5 miles, 7 hrs, 4000 feet Benefits: Fall Colors, Mountain Views Description: A fantastic hike that spans from a beautiful canyon through vast scenic mountain views. This hike is a grand one. This hike is best done as a one-way, involving a shuttle between Horse Ranch Park and Erickson Springs. Hitch-hiking is a viable and relatively easy option. Route: Most people hike this route from Horse Ranch to Erickson Springs as this direction is mostly downhill. The route is well marked and has only a couple of intersections. Follow the signs to Erickson Springs. Those hiking in the opposite direction should follow signs to Horse Ranch. Trailhead: Horse Ranch Park, see above. Or Erickson Springs, approximately 15 minutes past the Ruby Anthracite Trailhead, see below. Trip Reports:September 2012 Maps:Google Map, GPX Track
Ruby Anthracite Trail 836
Miles, Time, & Vertical Elevation Gain: 7 miles +, 3 hours + , 1500 feet + (Data given to Ruby Anthracite Creek. However, hikers can continue on the trail.) Benefits: Fall Colors, Wildflowers, Mountain Views Description: There is one word to best describe this trail – lush! Hikers will experience dense foliage, lots of ferns and willows, as well as wildflowers in the height of summer. It is overgrown and I highly recommend wearing pants as the plants can chafe your legs. Sometimes it is so overgrown, you’ll find yourself wondering if you’re even on the right path. This trail also has fantastic views of Marcellina and the surrounding mountains. It is the only trail in the Crested Butte area that I can think of that looses elevation. At first it looses gently, but then becomes very steep as it enters the very serene Ruby Anthracite Gorge. Route:From the trailhead, continue on 836. There are no splits until about 5 miles. Unless you plan on doing a large loop that requires a shuttle or hitch-hiking, this hike is best done as an out and back. Follow the trail about 3 miles to Ruby Anthracite Creek. The creek is wonderful and you may wish to turn your hike around there as you must climb back up steep trail out of the gorge. If you want another look at Marcellina from a different perspective, cross the creek and continue on the trail up the other side about a mile. The trail will be overgrown through here until it rises above the gorge and onto a sage-scaped land. Views are good from here and it’s a good place to turn around. Some people may want to continue on down into the Dark Canyon and end at Erickson Springs – generally down hill and a total of 10 miles from the trailhead. Trailhead: On Kebler Pass Road, go past Horse Ranch Park and past the turn for Lost Lake Campground. Continue about 1.7 miles past the campground (about 6.2 miles past Horse Ranch Park) and look for an obscure dirt road on your right. It is marked with a sign just before it. The dirt road is pretty rough, especially when wet and can be overgrown – it scratched my Subaru. You may want to park on Kebler Pass road instead of continuing up the road. The trailhead is about 1/4 mile up the road. Trip Reports:August 2012 Maps:Google Map, GPX Track
Copley Lake
Miles, Time, & Vertical Elevation Gain: 4 miles + (can walk some around the lake), 2 hrs, 1300 feet Benefits: Wildflowers, Lake Views Description: A short trail, close to town, that is moderately steep, this trail has good wildflowers, even in dry years. Scenic vistas are lacking on the actual trail until the lake, but the views from the lake are phenomenal. Route: From the trailhead, follow the Elk Creek trail upwards. The trail is not well-marked. The Wagon Trail will run left to right along the Kebler Pass Road. Do not follow the Wagon trail. Instead, follow a trail that looks like and old road and is very steep at first. The steepest part of the trail is at the beginning and it mellows after the first 1/4 mile. It maintains its moderate steepness the rest of the way. The trail is an old road. After about 1.5 miles, there is a meadow with a cairn and a path leading to the left. This intersection is not well marked. Instead of continuing on the road, follow this left path to the lake. Trailhead: The Trailhead is not well marked. It is about 3.5 miles past the town limits on Kebler Pass Road. There will be a parking area on the left side of the road (south). The trail is directly across the road on the north side. If you pass the signs for Splains Gulch (a left turn off of Kebler Pass), you have gone about 0.7 miles too far. Trip Reports:July 2012 Maps:Google Map, GPX File
Green Lake / Ruby Peak
Miles, Time, & Vertical Elevation Gain: To Green Lake: 5 miles, 2 hours, 1400 feet To the saddle: 6 miles, 3 hours, 2200 feet To Ruby Peak: 7 miles, 3.5 hours, 2650 feet Benefits: Mountain Views, Lake Views Description: This hike is great because it has a lot of options – Green Lake, Ruby Saddle, and Ruby Peak. The hike to the actual lake is moderate, but steepens toward the saddle and the peak. Green Lake itself is beautiful. And for those venturing beyond the lake, the views west of Ruby are hard to beat. Route: Where you start your hike depends on where you actually are able to park your car. Either way, you will be following a road which continuously degrades in condition. The road will split eventually. One fork will go right toward the north side of Owen, the other will head left to the basin between Ruby and Owen. Take the left fork. The road will swing by Green Lake, though to visit the lake requires a quick jaunt off the actual road. The road continues up past the lake to near the saddle. At a fairly obvious point near the saddle, look for a primitive trail that climbs steeply up to the actual saddle. Don’t follow the road past here. Take the trail instead. Those who desire to summit Ruby peak, the path is obvious. Just follow the ridge south from the saddle. The actual summit is about 20-25 minutes away. Trailhead: From the Y, head toward Irwin Lake and Irwin Campground. It is 2.5 miles to the lake and the campground is just a bit further along the lake. Most cars can reach the campground and some may actually wish to park there. If you wish to venture beyond the campground, follow the road about a half mile until it splits. Take the right fork. In another half mile it splits again. This time take the left fork. Shortly after this left fork, the road deteriorates and most will want to park somewhere along the road close to the south side of Ruby. The map and mileage start at this point. There are currently private property disputes regarding access to this area. Please respect private property. Trip Reports:August 2012 Maps: To saddle: Google Map, GPX File
Ruby/Green Lake combo: Google Map, GPX File
Mount Owen
Miles, Time, & Vertical Elevation Gain: Stats begin from road near south side of Ruby: 7 miles, 4.5 hours, 2500 feet Benefits: Mountain Views, Peak Climb Description: This climb has some of the best views in Crested Butte! It ascends along a ridge line which some may feel is exposed and airy. But, the path is relatively well-trodden. Route: Follow the directions to the saddle above Green Lake near Ruby (see above). From there, follow the obvious ridgeline to the north. Though a trail is not marked, there is a fairly obvious trail to the summit. Trailhead: For trialhead info, see Green Lake / Ruby above Trip Reports:Sept 2012 Maps:Google Map, GPX File
Scarps Ridge Loop
Miles, Time, & Vertical Elevation Gain: 4.5 miles, 2 hours – or more to enjoy the views, 1530 feet Benefits: Mountain Views, Wildflowers Description:Of all the trails in the Crested Butte area, this one makes me want to bust out singing “the hills are alive with the sound of music” more than any other. Largely above treeline and with stunning views off all the surrounding Elk Mountains, this one should be on the top of your list. Route: The trail climbs fairly steeply and steadily straight from the trailhead. If doing the loop clockwise (shorter length, but steeper ascent), simply follow the trail to the ridge and keep following it about 2 miles to the Scarps ridge high point. When returning, follow the same trail back at first for about 1/4 of a mile. After the trail passes through a rock band, you should notice a trail higher along the ridge than the one you came on. The trail is not obvious at first, but becomes more defined as it continues. This trail follows along the ridge for about 1/2 mile before dropping down (You will see a split in the trail, turn right). Eventually it connects with your ascent trail. If doing the loop counter clockwise (longer length, but less steep ascent) then follow the trail from the trailhead. Around .4 miles, there will be a rock slab on your right. This rock slab is the beginning of your ascent trail, but it is likely not well marked and easily missed. Occasional cairns mark the turn, but don’t count on it. Once passing over the rock slab the trail becomes better defined. As you approach the top of the ridge, the trail will split. Turn left. Follow this to the high point on the ridge. Return using the lower trail when the trail splits. Trailhead: From the Y, head toward Irwin Lake and Irwin Campground. It is 2.5 miles to the lake and the campground is just a bit further along the lake. Continue following the road about a half mile until it splits. Take the right fork. In another half mile it splits again. Take the right fork again, going by some CS Irwin buildings. There will be many sings indicating Private Property and it can be somewhat intimidating. The road is public, but the land beside the road is not. So, simply stay on the road and you’ll be fine. The road ends in about a mile after the turn, stopping at the Irwin Lodge. The trail is on the left, but is not clearly marked. Trip Reports:August 2012 Maps: Maps include a section of road at the end! Google Map, GPX File
Gothic Area/Schofield Pass Hikes
Trailhead Info
The town of Gothic is located on Gothic Rd about 5 miles from Mount Crested Butte. From Mount Crested Butte, continue up Gothic Road (the main road) about 1.7 miles until there is a fork in the road. At the fork, take the left path, following a dirt road another 3.5 miles to the town of Gothic. To reach Schofield Pass, travel another 4 miles past the town of Gothic. After a mile or two past Gothic, the road can be rough and there can be a snow plug around 3 miles that can be present into July (sometimes even later in really big snow years). Check local shops for road status information. To get to the Schofield Park / West Maroon Pass trailhead, go up and over Schofield Pass. The road will fork again right after the pass. Take the right fork (straight) toward Marble. The trail head is about .8 miles past Schofield Pass, on the right side. It will be unmarked, but it’s likely that plenty of cars will be parked there.
Copper Lake
Miles, Time, & Vertical Elevation Gain: 10 miles, 4 hours 30 min, 2300 feet – If parked at lower lot, add another mile, 30 minutes, and another 200 feet. Benefits: Lake Views Description: This trail is not steep. The steepest parts of the trail are at the beginning. It travels through pine and aspen forests as well as meadows before reaching the lake. This trail is one of the more popular trails in Crested Butte and can you will see many people on the the weekends. Route: From the trailhead, follow the signs for trail 983 toward Judd Falls. You will pass the overlook for Judd Falls after about a mile. Continue another 3 miles on the trail to the lake. Return via your ascent route. Trailhead: Copper Creek Trailhead. From Gothic, continue through the town and go another half mile until you see parking for Judd Falls. You can park here or continue up a dirt road another half mile to the Copper Creek trailhead. This last dirt road is passable by many fairly high-clearance cars. A true 4×4 is usually not necessary. Trip Reports:August 2012 Maps:Google Map, GPX File
East Maroon Pass
Miles, Time, & Vertical Elevation Gain: 12 miles, 5 hours 30 minutes, 2850 feet Benefits: Lake Views, Mountain Views, Wildflowers Description: Great views of the Eastern portion of the Elks! Worth the extra mile from Copper Lake! Route: Follow the directions to Copper Lake. Beyond Copper Lake the trail will begin to climb steeply. Continue about another mile up the trail to East Maroon Pass. You can continue on this trail toward Aspen (see below). Return via your ascent route. Trailhead: Copper Creek TH -See Copper Lake. Trip Reports: None Maps:Image – from Copper Lake, Google Earth File from Copper Lake, also see East Maroon Pass to Aspen below.
East Maroon Pass to Aspen
Miles, Time, & Vertical Elevation Gain: 16 miles, 8-10 hours, 3500 feet Benefits: Lake Views, Mountain Views, Wildflowers Description: A beautiful way to get to Aspen, and much less crowded than the more typical West Maroon Pass hike. Route: Follow the directions for 5 miles to Copper Lake. Beyond Copper Lake the trail will begin to climb steeply. Continue about another mile up the trail to East Maroon Pass. Begin descending into the East Maroon Creek valley, crossing the creek in another mile. Shortly after, you will encounter trail 1981 which heads east and upward. Instead, continue north and down valley. There will be several creek crossings after that. But, most are not very significant until you cross the East Maroon Creek further down valley at about 9 miles and again at just under 10 miles. From there, continue following the East Maroon Creek trail for another 4 miles. At that point, you will emerge into the Maroon Creek Valley and on to the Maroon Creek Trail. You will need to decide whether to turn right (east) to the East Portal or left (west) to Maroon Lake, both being 1.7 or 1.8 miles respectively. If you make the east turn, you will follow the trail to the Maroon Creek Road. If you make the left turn, you will go a little over a mile until crossing the East Maroon Creek and then reaching the Maroon Creek Road and West Portal. To reach Maroon Lake, it is advised to follow the road another .5 miles west. An alternative option is to take a trail which parallels the road to the north and gains a few hundred vert. This trail is tedious after so many miles, though, and can often be muddy. Once reaching Maroon Lake, a bus can usually be taken in to the town of Aspen. Spend the night if you can! Trailhead: Copper Creek TH -See Copper Lake. Trip Reports:August 2015 Maps:GPX Track, Google Earth File, Google Map
Copper Pass Loop
Miles, Time, & Vertical Elevation Gain: 17.5 miles, 8-9 hours, 4500 feet Benefits: Mountain Views, Lake Views Description: Continues from Copper Lake over two very scenic passes in the Eastern portion on the Elks Route: Follow the directions to Copper Lake. Beyond Copper Lake the trail will begin to climb steeply. Continue about another mile up the trail to East Maroon Pass. Descend on the north side of the East Maroon Pass for a mile. Instead of continuing toward Aspen, take a trail that veers right (1981 east). Follow this trail 2.5 miles to the top of Copper Pass. Descend down Triangle Pass trail toward Copper Lake for about 2 miles. Follow 983 back to the trailhead. Trailhead: Copper Creek TH -See Copper Lake. Trip Reports: None Maps:Google Earth File – from East Maroon Pass
Rustler Gulch
Miles, Time, & Vertical Elevation Gain: 9 miles, 3 hours 45 min, 2600 feet Benefits: Wildflowers, Mountain Views Description: This is a beautiful hike that travels through one of Crested Butte’s most scenic valleys, showcasing some of our biggest hard-to-reach peaks. Many people use this trail as an access to reach those peaks. Route: The length of this trail depends on how far up the road you park. Most people park near the 401 intersection. From there, continue up the 4×4 road for about a mile until the road becomes trail. The trail is straight-forward, as there are no intersections. This hike is best done as an out-and-back as the trail fades near the end of the valley. Trailhead: The trail head is reached from Schofield Pass road. Travel about 2.7 miles past the General Store in the town of Gothic. Turn right at a sign marking Rustler Gulch. After about 1/4 of a mile, there is a water crossing. The crossing can be quite deep, but water doesn’t flow fast and it is not rocky. Most people park just after the water crossing. Trip Reports:September 2012 Maps:Google Map, GPX File
West Maroon Pass
Miles, Time, & Vertical Elevation Gain: Out and Back: 8.2 miles, 4 hours, 2200 feet To Aspen: 11 miles, 6-7 hours, 2800 feet gain, drops 3700 feet Benefits: Wildflowers, Mountain Views Description: This is one of the most scenic hikes in the Crested Butte area. It is known for it’s excellent wildflowers and superb mountain views. Much of this is above treeline, so make sure to go early in the day before afternoon storms approach. This hike can be done as an out and back to and from the pass. But, it is even better done as an overnight, staying in the Aspen area. Route: From the trailhead, follow the West Maroon Trail up the East Fork Valley. As the trail rises out of the valley along the flanks of Bellview Mountain, the trail will split at 3.3 miles. Follow the right path toward West Maroon Pass. This is the steepest section of the trail. The pass is just over 4 miles from the trail head. Here, you can return via your ascent route, or you can descend down West Maroon Creek valley toward Aspen. If you descend to Aspen, the trail is fairly steep for the first mile or so, becoming more gradual as you descend. Follow the signs to Crater Lake and Maroon Lake. See trip report for details of how to get to Aspen from Maroon Lake. Trailhead: Schofield Park – Continue over Schofield Pass another .8 miles to a parking area on the right. Schofield Park is a wide open flat meadow. Trip Reports:August 2012 Maps:Google Map, GPX File
Frigid Air Pass
Miles, Time, & Vertical Elevation Gain: 10 miles, 4 hours 30 min, 2300 feet Benefits: Wildflowers, Mountain Views Description: Again, a very scenic trail! Not only will you likely see fantastic wildflowers, but you will see excellent views of the south side of the Maroon Bells. Like West Maroon Pass, most of this is above tree line, so travel early, before afternoon storms threaten. This trail is best done as an out-and-back, but those who desire can travel further into Fravert Basin- probably best done as an overnight backpacking trip. Route: From the trailhead, follow the West Maroon Trail up the East Fork Valley. As the trail rises out of the valley along the flanks of Bellview Mountain, the trail will split at 3.3 miles. Take the left path toward Frigid Air Pass. The trail will begin to climb steeply as you approach the pass. Descend via your ascent route. Trailhead: Schofield Park – See West Maroon Pass Trip Reports: See Hasley Pass / Frigid Air Pass Loop Maps:Image, Google Earth File
Hasley Pass
Miles, Time, & Vertical Elevation Gain: 7 miles, 3 hours, 1800 feet Benefits: Wildflowers, Mountain Views Description: I love the views from the other nearby passes. But, the views that span from the top of Hasley are probably my favorite. Diverging from the main Maroon Bells route, you’ll likely see less people – and a whole lot of sheep! Plan on spending some time on top of the pass to soak in the wonderful views. Route: From the trailhead, follow the West Maroon Trail up the East Fork Valley. After 2 miles, there is a split in the trail that is well marked. The left path leads toward Hasley. After parting from the valley, the trail climbs steeply to a shelf. At the beginning of the shelf, there is a smaller unmarked path that takes off to the right and leads toward Frigid Air Pass. Stay on the main path, which veers left at the split. The views from the shelf are spectacular and you’ll likely see sheep before reaching the pass. Trailhead: Schofield Park – See West Maroon Pass Trip Reports: See Hasley Pass / Frigid Air Pass Loop Maps: See Hasley Pass / Frigid Air Pass Loop Map
Hasley Pass Loop
Miles, Time, & Vertical Elevation Gain: 6 miles, 3.5 hours, 1850 feet Benefits: Wildflowers, Mountain Views Description: A short hike, but one of the best that Crested Butte has to offer. If you like wildflowers, this is the hike for you! The peak for wildflower viewing is in July. Be prepared for sensory overload! Make sure to charge your camera ahead of time, and build in extra time for stopping to enjoy the fields of wildflowers! A note: This trail is not well defined in places. If you are not familiar with the area, it may be best to climb to Hasley via the standard route described above. Route: From the trailhead, follow the West Maroon Trail up the East Fork Valley. Just after about a half mile, there is a split in the trail. The split is usually unmarked. Take the left fork upward, rising above the valley. The trail is usually defined, but in places it is not. Eventually, it climbs to a bench. You may see a split in the trail. If you do, turn right. The trail will hug the valley on the west side before turning into the basin below Hasley Pass. This part of the trail may fade. Head toward the pass and return back down the valley via the standard trail to Hasley. Trailhead: Schofield Park – See West Maroon Pass Trip Reports:July 2013 Maps:Google Map,GPX File
Hasley Pass / Frigid Air Pass Loop, Option 1
Miles, Time, & Vertical Elevation Gain: 10 miles, 5-6 hours (plan for time to enjoy the views!), 2900 feet Benefits: Wildflowers, Mountain Views Description: My two favorite passes in the Crested Butte area. This hike simply cannot be beat. Route: Follow the directions for Hasley Pass. From the top of Hasley Pass, there is a trail that begins downward into Hasley Basin. This trail is unmarked, but not difficult to find. However, don’t follow the trail all the way into the basin. Look for a trail to the right that traverses around to another saddle. See the trip report for more details on this path because it can be difficult to find. Continue over the saddle, traversing toward Frigid Air. From the top of Frigid Air, follow your return path for .3 miles until a split. Follow the left path toward West Maroon Pass. After 1.5 miles, there is another split. Follow the right path down the valley instead of heading toward the pass. Trailhead: Schofield Park – See West Maroon Pass Trip Reports:August 2012 Maps:Google Map,GPX File
Hasley Pass / Frigid Air Pass Loop, Option 2
Miles, Time, & Vertical Elevation Gain: 9.2 miles, 4-5 hours (plan for time to enjoy the views!), 2700 feet Benefits: Description: Similar scenery to the loop above, but more off the beaten path. This hike takes you off trail at times, and right through endless fields of wildflowers. July is best for this loop! Route: From the trailhead, follow the West Maroon Trail up the East Fork Valley. After 2 miles, there is a split in the trail that is well marked. The left path leads toward Hasley. After parting from the valley, the trail climbs steeply to a shelf. At the beginning of the shelf, there is a smaller unmarked path that takes off to the right and leads toward Frigid Air Pass. This trail is obvious at first, but eventually vanishes in the fields. However, by then, Frigid Air is in plain sight and you can cut across the tundra to reach the obvious trail to the top. Descend Frigid Air down the same side until you reach a pond. Turn left at the pond to an obvious trail that is unmarked but leads toward a saddle. Go up and over the saddle, veering left as you descend. Look for an obvious path to the left leading through the scree pile. Follow this trail to the top of Hasley Pass. Descend via the traditional path, or the Sheephearder’s path (see Hasley Pass loop). Trailhead: Schofield Park – See West Maroon Pass Trip Reports:August 2012 – Different path, but similar views Maps:Google Map, GPX File
Triple Bipass Loop – Hasley, Frigid Air, and West Maroon
Miles, Time, & Vertical Elevation Gain: 10.5 miles, 6-7 hours (plan for time to enjoy the views!), 3300 feet Benefits: Wildflowers, Mountain Views Description: So beautiful you might just need a triple bipass after this hike. Not too much further than my favorite Hasley/Frigid Air Loop and worth the extra effort. Route: >Follow the directions for Hasley Pass / Frigid Air Pass Loop to the top of the Frigid Air Pass. Descend your ascent route from Frigid Air for .3 miles until the path splits. Follow the left path toward West Maroon Pass. After 1.5 miles, there is another split. Follow the left path toward the West Maroon Pass. From the pass, return to the same split and continue down the valley back to Schofield Park. Trailhead: Schofield Park – See West Maroon Pass Trip Reports:August 2014 Maps:Google Map, GPX File, KMZ File
Schofield Pass Loop
Miles, Time, & Vertical Elevation Gain: 4.8 miles, 2 hours, 1200 feet Benefits: Wildflowers, Mountain Views Description: This loop is a great option for those seeking to stay a little lower than some of the nearby passes (Frigid Air, Hasley, and West Maroon passes), but still wanting great views. The route is also a bit shorter than some of the nearby passes. Route: This is described as a counterclockwise loop. From Schofield Pass, ascend trail 401. There could be many bikers on this trail, but they will not be traveling much faster than hikers as the trail is fairly steep. The trail begins in a thick forest and eventually climbs above treeline. Where most bikers stop to take a break before their descent, there is a split in the trail (1.3 miles from the Schofield Pass TH). Here you will say “bye” to the bikers and head north on the Schofield Trail. After about 1.5 miles, there will be an intersection with the West Maroon Trail. Head left (east). It is 1.2 miles to the Schofield Park trail head. Follow the Schofield Pass Road .75 miles south back to Schofield Pass. Trailhead: Schofield Pass- parking is limited. Park well off the side of the road. Some may prefer to begin their hike at Schofield Park / West Maroon trailhead (see West Maroon Pass) and do the loop clockwise instead of counterclockwise, or walk on the road before accessing the trail. Trip Reports:July 2014 Maps:Google Map, GPX File, KMZ File
Geneva Lake Loop
Miles, Time, & Vertical Elevation Gain: 16.5 to 17.5 miles, depending on ascent route to Hasley, 8 hours, 5500 feet
To Geneva Lake: 7.7 to 8.7 miles, depending on route to Hasley Pass. Walking around the Lake could add close to a mile
From Geneva Lake to trailhead: a little over 8 miles from near center of Lake Benefits: Wildflowers, Mountain Views, Lake Views Description: Another absolutely stunningly beautiful loop, but considerably longer than many of the others described here. Fit people can do this in a day, or it can also be done as a one or two-night backpacking trip. However you choose to do this, this area is relatively remote and fun to explore. This route also spends a lot of time above treeline Route: This is described as a counterclockwise loop. The initial part of the climb heads towards Hasley Pass. For more detail of how to get there, see several of the above descriptions, including the Hasley Pass Loop. From the top of Hasley Pass, descend into Hasley Basin, where the trail is fairly defined most of the way through the basin. Eventually it will descend steeply in a forest, and then merge with the North Fork trail, about 2.7 miles after the top of Hasley Pass. Turn left on to the North Fork trail and cross the creek shortly thereafter. Follow the North Fork for about another half mile until a split. Take the right split heading up toward Geneva Lake. The trail will split again after about a mile, the right heading to Trailriders Pass. The left path, which is well signed, will head toward Geneva Lake. Follow the trail to the lake and around the lake. Camping at the lake is highly recommended! After walking round the lake, descend the trail on the lake’s southwestern side toward Lead King Basin. When the trail ends, follow the road downward for about a half mile. From there, you will see a meadow going up the hillside across the way. The Sheepherder’s trail passes through this meadow but the start can be hard to find. when in doubt, begin climbing upward through the meadow, trending the right side of it. A very obvious drainage should remain on your right until near the top of the route. The trail climbs very steeply for about 1.8 miles until reaching a bench. It then contours along the bench for about 2.8 miles. Finding where to begin the descent can be difficult as the trail is very faint. As the trail begins to contour as if heading back up the East Fork Valley, look for a small mud bog. Turn right, heading downward and trending slightly right until you come across the trail. Trailhead: Schofield Park – See West Maroon Pass Trip Reports:August 2013, August 2013 part 2 Maps: Part One: Google Map, KML File, GPX File
Part Two: Google Map, KML File, GPX File
Slate River Area Hikes
Trailhead Info
Oh-Be-Joyful campground is located about 5 miles up the Slate River Road. Most cars can make it to this camground. The best parking is across the Slate River, though this crossing can be really treacherous with high runoff in spring and early summer. If you do make it across the river, then you may choose to go up the road a bit more. The first 1/4 mile isn’t difficult, but the road does worsen. High clearance vehicles are usually needed to make it the 1.7 miles to the end. The mileage and elevation below is from the campground.
Daisy Pass
Miles, Time, & Vertical Elevation Gain: As a loop: 11.5 miles, 5.5 hours, 2900 feet
As an out and back: 14 miles, 7 hours, 2800 feet Benefits: Wildflowers, Mountain Views Description: This area is also known for being one of the most scenic areas of Crested Butte. You’ll get wildflowers and spectacular mountain views. This loop is best done as a shuttle so as to avoid over 2 miles of walking on the Slate River road. To do this, go up Slate River Road past the Oh-Be-Joyful Campground. Continue another 2 miles or so to a split in the road. One split goes across the river, the other up the hill. This area is called “Pittsburg” and you should park here. Most cars have the capability of making it to this point, but most don’t have the capability to cross the Slate River (depending on runoff) and continue up the Poverty Gulch road. Park another car at the Oh-Be-Joyful trail head to begin your hike. Route: From the campground, go up the Oh-Be-Joyful road. This road becomes a trail which climbs gradually most of the time, until it approaches the end of the valley. After about 5.8 miles there will be a split in the trail. Turn right (north) onto the Democrat Basin trail. After another 1.2 miles, there is another split. Turn right (northeast) toward Daisy Pass. Go to the top of Daisy Pass, another mile and a half past the split. Continue down the other side of Daisy Pass another .7 miles until you meet a road. Continue following the road downward. This road merges with Poverty Gulch road. Turn right onto Poverty Gulch and go another 2 miles to Pittsburg. Trailhead: Oh-Be-Joyful campground Trip Reports:June 2010 Maps:Image, Google Earth File
Blue Lake via Oh-Be-Joyful
Miles, Time, & Vertical Elevation Gain: 13.5 miles, 5.5 hours, 2500 feet Benefits: Mountain Views, Lake Views, Wildflowers Description: Again, another beautiful hike. Unlike the Daisy Pass hike that takes hikers above the valley to see the views, this hike stays in the valley. Though a bit longer than Daisy Pass, the terrain is generally easier. The lake sits on a bench at the bottom of two wonderful mountains – Purple Peak and Afley Peak.
Route: From the campground, go up the Oh-Be-Joyful road. This road becomes a trail which climbs gradually most of the time, until it approaches the end of the valley. After about 5.8 miles there will be a split in the trail. Turn left (south). Continue another 1 mile up the trail, which climbs steeply at times, until there is a split that you may or may not notice (difficult to find). Turn right at the split and continue another 1/4 mile up to the lake. Trailhead: Oh-Be-Joyful campground Trip Reports:August 2012 Maps:Google Map, GPX File
Peeler Lakes
Miles, Time, & Vertical Elevation Gain: 5 to 7 + miles, 3 to 5 hours, 1000 feet Benefits: Lake Views, Mountain Views Description: This hike begins in the scenic Redwell Basin and travels through one of the most beautiful old-growth forests in the Crested Butte area before ending at the lakes which are nestled high in Peeler Basin. This trail has low elevation gain, but does have a few steep sections that are short. Be aware that parts of the trail and the area around the lakes can be very boggy and your feet will likely get wet. Route: From the trailhead in Redwell Basin, begin hiking on trail 404. The trail begins by descending steeply, with wonderful mountain views. As the trail enters the forest, it winds around the edge of the mountain to enter Peeler Basin. In order to reach the lakes, you will need to veer left (south) off trail. The first Lower Peeler lake can be reached by making this turn around 1.5 miles after the trailhead. The next lake can be reached by making the turn at 1.8 miles. Having a GPS will certainly help you find these lakes easier and is highly recommended. In both cases, you will need to cross the stream that flows at the bottom of the Peeler Basin. Also, if you wish to travel further up the trail past 1.5 miles, be aware that the trail can be difficult to follow at times as it is very fain in areas. Trailhead: The trailhead begins in Redwell Basin. This is accessed using Gunsight Pass Road. This road is recommended for high-clearance 4WD cars only. To get to Gunsight Pass Road, turn onto Slate Road and travel about 4.2 miles and then turn left onto a dirt road. The dirt road will quickly lead to a bridge that crosses the Slate River, but the bridge is only for pedestrians. Cars will need to go through the river – which may be quite high in spring and early summer. After traveling 4.7 miles up Gunsight Pass Road, you will see an old mining road veering downward and to the right. This road is even more difficult traveling for a car than the Gunsight Pass Road. But, this is the road that leads to the trailhead and if your car can get there, parking is easy.
You may choose to keep your car on Gunsight Pass Road, so look for parking along the road – which can be difficult to find unless you travel a little further up the basin. An alternative to driving is to ride a bike up the road. If you do this, I suggest starting at town or at Peanut Lake, taking the Lower Loop, and then ascending the Gunsight Pass Road. Beginning at Peanut Lake will require a 6.5 mile bike ride (1.5 to 1.75 hrs) to the trailhead. Descending the road and Lower Loop back to Peanut Lake takes about 1 hr – faster than driving. Trip Reports:Sept/Oct 2014 Maps:Google Map, GPX File, KMZ File
Washington Gulch Area Hikes
Trailhead Info
After turning on to Washington Gulch Road, the road will pass through a residential area. Shortly after that residential area, the road becomes dirt – about 1.5 miles after turning on to Washington Gulch Road. This is the “winter closure” and the parking for Meridian Lake (aka, Long Lake).
Meridian Lake (also called Long Lake)
Miles, Time, & Vertical Elevation Gain: Trail only: 1 mile, 1 hr, 500 feet
To take the road back down: 2.5 miles, 1 hr 15 min, 500 feet Benefits: Lake Views, Swimming Description: This is a popular area for both locals and tourists alike, but few venture farther than the lake itself. After reaching the lake, the trail follows on the west end of the lake and climbs up to a ridge, allowing for some great views of surrounding mountains like Gothic, Avery, and Whetstone. Long Lake itself is the best swim spot in Crested Butte. So, turn your hike into a swimming excursion as well! Route: From the trailhead, cross the Washington Gulch and follow the trail which climbs very steeply up to the lake. The hike to the lake is about a half a mile. (From there, follow the trail to the right, following along the northern, then western, edges of the lake. This portion of the trail is not steep. The trail eventually gains a ridge. On top of the ridge there is a fence indicating private property so hikers can go no further. Updated, Summer 2015:. The trail mentioned, in parentheses, on the western edge of the lake is now closed about a few hundred yards away from the lake due to private property issues. Signs are clear about the closure, and it only applies to the trail that goes on the west edge of the lake and above. Please respect private property. Mileage and time have been modified above to account for this closure. I have kept the trail mentioned in the guide for historical purposes and hopes of an easement.) Descend the ascent route. For a longer hike, instead of walking down the steep trail from the lake, continue eastward on the north side of the lake until you come to a sparsely used dirt road which veers to the left. Follow this down to the Washington Gulch road. Walk west along Washington Gulch road back to the trailhead. This adds on about 1.5 miles. Trailhead: Meridian Lake Trailhead – take Washington Gulch road for about 1.5 miles. The parking lot is on the left, past a subdivision of houses, and usually marked. Trip Reports:Sept 2014 Maps:Google Map, GPX File
To add the road loop: Google Map,GPX File
Gothic Mountain
Miles, Time, & Vertical Elevation Gain: To north summit only: 5.1 miles, 3.5 to 4 hours, 2450 feet
To south summit: add another mile, another hour, and about 500 feet. Benefits: Mountain Views, Peak Climb Description: Gothic Mountain is as iconic to Crested Butte as the actual Mount Crested Butte itself. This hike will take you through meadows, forest, and alpine tundra, while also allowing for beautiful views of the peak itself. Route: The trail to Gothic is not marked. Park at the trailhead described and begin walking northeast through the meadow that follows along the drainage on the northwest side of Gothic Mountain. The trail is fairly obvious for about a mile until it opens up into another meadow. The trail seems to be faint to nonexistent here. Bear a slight right through the meadow and you will eventually see a trail that cuts harder right into the trees (Bearing left instead will result in merging with trail 403). The trail will climb steeply along a ridge through the forest and then on to alpine tundra. Parts of this hike may feel “exposed” to some hikers. The trail leads directly to the north summit. If you want to continue to south to the true summit, continue following the ridgeline. Return via your ascent route. Trailhead: Turn on to Washington Gulch road. The road will follow the valley a long ways. Eventually, it climbs upward, out of the valley, to Elkton. The trailhead is before this climb upward, and before any big switchbacks, approximately 6.8 miles past the actual turn off onto the Washingtown Gulch road. To be safe, start looking for the trail in the grass on the right side of the road between miles 6.5 and 7. Parking is usually on the left side of the road. Again, the trailhead and parking are not marked. Trip Reports:October 2012 Maps:Google Map, GPX File
Yule Lakes
Miles, Time, & Vertical Elevation Gain: 9.5 miles, 5 hours, 2400 feet Benefits: Lake Views, Mountain Views Description: This is a beautiful hike through alpine terrain! The lakes are stunning with Treasure as a backdrop. Although the route is not on a defined trail the entire way, the lakes are still not hard to find. Many people opt to camp at the lake and hike Treasure Mountain from camp. Route: From Paradise Divide, head west on an old rocky road that has several wash outs. Yule Pass is just under 2.5 miles from the start of the road. At the top of the pass, look for the trail (not the road that goes to the left) that goes straight down into the valley on the west side. The trail is not marked, but is not difficult to find. After descending for about a mile there will be a trail on the right that ascends to the north west toward Treasure. This trail is marked with a cairn but not a sign. Take this trail and it is well-defined for about another mile. Then it seems to fade out at a stream crossing. Never fear. At the stream crossing stay on the existing bench and follow it west. You may see evidence of other foot traffic every once in a while. Follow the bench until it ascends a hundred feet or so up to Yule Lakes. Return via your ascent route. Trailhead: Access is from Paradise Divide. Slate River Road, Gothic Road, and Washington Gulch road all lead to Paradise Divide. But, the best way is probably to take Washington Gulch Road. Park on the side of the road at Paradise Divide. Trip Reports:August 2012 Maps:Google Map, GPX File
Other Hikes
The hikes listed below don’t fit into the categories listed above. These hikes are scattered about, on Washington Gulch, Brush Creek, and beyond.
Twin Lakes
Miles, Time, & Vertical Elevation Gain: 6 miles, 3 hours, 1300 feet Benefits: Lake Views, Mountain Views, Wildflowers Description: One of the most scenic hikes in the Crested Butte area, this hike is top notch. It winds through forests and meadows before opening up to alpine tundra. The lakes are crystal clear with a stunning mountain backdrop. Access is difficult, but if you can make it work, this hike is definitely worth your while. Route: From the trail head, hike 3 miles to the lakes. There aren’t any intersections until the lakes. It doesn’t get much easier than that! Trailhead: Twin Lakes trailhead off of Brush Creek Road. A high clearance 4×4 or a bike is generally necessary to get to the trail head. Details of the trail head access can be found in the trip report. Trip Reports:July 2012 Maps:Google Map – the starting point and ending point on the map shown are a mile from the actual trailhead.
Miles, Time, & Vertical Elevation Gain: From the top of Silver Queen: 2.6 miles, 1.5 hours, 660 feet
From the ski area base: 11.6 miles 5 hours 2700 feet
Also consider taking the lift up (must pay) and walking down or walking up and taking lift down (free). Benefits: Mountain Views, Peak Climb Description: Otherwise known as the ski area peak, this hike is a fun one – though it sometimes can be crowded near the top. Some hikers not accustomed to scree hikes may find a joyful challenge. Either way, the hike is certainly worth the view. Route: Routes vary. The easiest route is to pay for a one ride lift ticket up the Silver Queen and hike the 1.3 miles to the top. If starting at the base, there are many routes. But the most direct is to take the road, which is about 4.5 miles to the top. Any trail that is not designated solely for downhill mountain biking can also be used by hikers. If hikers wish to take a trail, I recommend the Westside trail or Columbine, both scenic and have good views. However, these trails are definitely less direct than the road. Trails don’t extend much beyond the top of the Red Lady Chair, so you’ll need to take a road the rest of the way to the top. Stop by the Adventure Center at the ski area to grab a map or find out trail details. Or, check out www.skicb.com and find a map there as well. Trailhead: Crested Butte Mountain Resort base area. Follow the signs for ski area parking. Trip Reports:August 2012 Maps:Google Map, GPX File
Mount Emmons (Red Lady) via the Plunge
Miles, Time, & Vertical Elevation Gain: 9 miles, 5 to 5.5 hours, 3300 feet Benefits: Mountain Views, Peak Climb Description: Mount Emmons is one of Crested Butte’s most popular backcountry ski zones. And it is equally fun to climb it during the summer months. The views of town from above are spectacular. The only major concern with this route is that it does cross private property. It is especially important to stay on the trail until above treeline, and adhere to any signs that are post Route: The Plunge is accessible by the Woods Walk. Start at the southern end of the Woods Walk and head north. After about a half mile, you will see an unmarked trail that goes up to the left and into the forest. This is the Plunge. The trail passes by two houses fairly immediately after the intersection. Continue following the trail upward through the forest. After about 1.5 miles, you will see another intersection, likely marked with cairns. It’s best to continue straight (right fork) to avoid potential private property issues. The trail eventually works its way to a ridge above treeline, becoming increasingly covered with scree. Continue following the obvious ridge to the summit. Return via your ascent route. Trailhead: From town, go west on White Rock toward Kebler pass. About .5 miles after the town limits, there is a fairly sharp left curve in the road. There is parking on the left side of this curve, along the side of the road. The Woods Walk begins on your right. Trip Reports:July 2013 Maps:Google Mapm GPX File
Mount Emmons (Red Lady) & Scarp’s Ridge Traverse
Miles, Time, & Vertical Elevation Gain: 10 miles, 5.5 to 6 hours, 3700 feet (starting from the Plunge going to Irwin Lodge) Benefits: Mountain Views, Peak Climb Description: This combines one of Crested Butte’s most popular mountains with one of the most scenic trails in the area and continues about 7 miles above treeline. This route usually requires a shuttle between both ends. Route: This route can begin at either end. I began by taking the Plunge close to town and walking toward Red Lady and then Scarp’s Ridge down to Irwin Lodge. This direction requires more uphill than down, as it begins lower than it ends. However, many people opt to do this route in reverse, beginning at Irwin Lodge and ending in town. Either way, it’s good to set up a shuttle from one end to the other! If you start at the Plunge and go to Red Lady, keep continuing westward on the ridge until you reach the Scarp’s ridge trail that goes down to Irwin. If you do it in reverse, follow the along the ridge on a trail that heads east, and then continue down the southeast ridge on Red Lady to meet up with the Plunge. Trailhead: Follow the directions for Red Lady (Mt. Emmons) or Scarp’s Ridge (from Irwin Lodge). Trip Reports:August 2013 Maps:Google Map, GPX File, KMZ File
Brush Creek Trail or East River Trail
Miles, Time, & Vertical Elevation Gain: 4.5 miles, 1.5 to 2 hours, 680 feet Benefits: Wildflowers Description: The Brush Creek trail or East River Trail is a great summer hike, blanketed with many wildflowers and harboring excellent views of the East River and surrounding peaks. Practically flat, this makes a great easy hike. Route:Though the trailhead reads “Brush Creek Trailhead” the actual trail is signed as East River Trail No. 634. This trail is done as an out-and-back as it dead-ends into private property. Once you start, there are no turns to make! So, route finding is exceptionally easy. There may be some creek crossings, depending on the time of the year and recent rainstorms. But, this trail is about as easy as they get! Trailhead: From town, head south and after about a mile, turn left onto Brush Creek Road. Continue on Brush Creek Rd for 1.9 miles. The road will become dirt. At 1.9 miles, you will find the Brush Creek Trailhead on your left. Park here and the trail begins in the back of the parking area. Trip Reports:July 2015 Maps:Google Map
Lamphier Lake
Miles, Time, & Vertical Elevation Gain: 5 miles, 3 hours, 1700 feet Benefits: Lake Views Description: This hike is a bit further from Crested Butte than most, but well worth the voyage. After climbing through lush forest, hikers are rewarded with spectacular scenery upon reaching Lamphier Lake. The hike is moderately steep and fairly rocky, but not difficult hiking. Route: From the trailhead which is 1/4 mile up from Gold Creek Campground, follow the Lottis Creek Trail through the forest and to the lake. The trail is an old road and crosses the Lamphier Creek a few different times. Trailhead: From Crested Butte, drive approximately 30 miles south to Gunnison. Turn left (east) onto HWY 50. Travel for 11.6 miles and take a left onto Co Rd 76 (there will be signs for Ohio City and Pitkin). Stay on Co Rd 76 for 8.7 miles. Toward the end of passing through Ohio City, you will see Co Rd 771. Turn left onto it, toward Gold Creek Campground. It is 6.8 miles to the campground. Here, the road is fine at first, but gets pretty rough the last mile or two. A somewhat higher clearance car is definitely needed for this last bit, but not necessarily 4-wheel drive. Once you arrive to the campground, the trailhead is another 1/4 mile past it. However, this section of the road is especially rough. You may prefer to park your car at the campground and walk to the trailhead. It is about a 90 minute and 55-mile drive to the trailhead from Crested Butte. Trip Reports:August 2014 Maps:Google Map, GPX File, KMZ File
Miscellaneous Peaks and Ridges
This section is reserved for climbs and hikes that go beyond a trail. These routes vary from having no trail to some faint climbers trails. The areas may be accessed by trails, but in the end, they go on the “road less traveled”! These routes are intended for those who are fairly experienced in the mountains as navigation may not be obvious and risks are higher than on standard trails. Some may wish to hire a guide, which can be done through Crested Butte Mountain Guides or Colorado Backcountry. Still, they are worth sharing! Enjoy!
Avery – Diamond Face
Description: A sporty climb up a flatiron-style rock that is about 45 degrees for 1000 feet. No ropes are required, but rock shoes or approach shoes are highly recommended! Access: Access is via lower 401 on a gully that crosses the trail and leads directly to the diamond face. Exiting is another matter. Many opt to follow the ridge down on either side of the diamond face, or you can exit on the east side into Virginia Basin. Trip Reports:August 2012 Maps:Google Map
Unnamed 13,130′
Description: Like any peak without a trail, there are multiple ways to reach this one. But a fun loop is to hike to West Maroon Pass, follow the ridge eastward to the summit, then descend to Rustler’s Gulch and follow the trial out from there. Access: The loop is best done as a shuttle, stashing one car at the start of Rustler’s Gulch for your exit and taking another car to your starting point at the West Maroon Pass trailhead. Trip Reports:October 2015 Maps:Google Map
Whetstone Mountain
Description: The climb begins on a trail, but then involves a little off-trail route-finding, bushwhacking, and talus climbing through Class 2 terrain. It’s a fun climb providing great scenery of the Crested Butte area. It’s especially good during the peak of leaf season in the fall. Access: Whetstone is most easily accessed via the new Baxter Gulch Trail. Currently, the upper reaches of this trail are under construction, but there is a well-established trailhead just south of town near the electric plant. Trip Reports:September 2015 Maps:Google Map
Afley to Oh-Be-Joyful to Hancock to Scarps Loop
Description: This hike starts off with a fun and fairly low-technical scramble, with the exception of the climb gaining the ridge to Afley. After the middle-Ruby-traverse ridge, this hike descends into to the beautiful Oh-Be-Joyful valley. A stop at Blue Lake is only 1/4 of a mile out of the way as you gain Star Pass. From there, a faint traverse trail leads along the western-most part of Scarp’s Ridge. Access: Drive past Irwin Lake on the road as far as your car can travel. As the road switches back to ascend toward Green Lake (between Ruby and Owen), continue on the scree toward Scarp’s Ridge. Descend from the ridge, traversing left toward Afley. Climb a fairly obvious couloir to the ridge. This couloir is the hardest and most dangerous part of the climb as the rock can be extremely loose. Trip Reports:September 2012 Maps:Google Map – ends part way up the ascent to Star Pass. Follow obvious traverse south from Star Pass an then west along Scarp’s Ridge.
West Elk Baldy Traverse (South Baldy, Middle Baldy, North Baldy)
Description: This hike is not technical, but most of it is off-trail and above treeline. If you want to check out a different area a bit further from the standards in Crested Butte, than this is a good choice. This traverse has some of most unique views, and is very remote. It is possible to continue this hike to summit West Elk Peak, a shorter option than coming up through Mill Creek. Access: From Crested Butte, drive to Gunnison and turn west onto HWY 50. When the road begins following along the Blue Mesa Reservoir, begin looking for the road to Raindbow Lake on the right. The road is labeled as 724 and does not have a brown sign to distinguish it very well unlike many of the other Forest Service roads in the area. So, keep your eyes peeled. If you reach a bridge which crosses the Blue Mesa, you have gone too far. Travel on 724 for about 13 miles until it ends just past Rainbow Lake. This road is accessible by cars that have decent clearance. They do not need to be 4-wheel drive. But, the road is bumpy in general. Expect it to take 45 minutes to travel on this road. From the trailhead, follow trail 449 for about 1.3 miles until the intersection with the West Elk Rim Trail 446. Turn right on this trail and follow it for about a quarter mile until a ridge where South Baldy Mountain is visible. Break from the trail here and follow the ridge to South Baldy. Continue following the ridge to Middle Baldy Mountain, Middle Baldy Peak, and North Baldy Mountain. Return via the same route, or use nearby trails to contour around the mountains. Trip Reports:August 2013 Maps:Google Map
Fossil Ridge Wilderness Peaks (Square Top Mountain, Henry Mountain, Fossil Mountain)
Description: This route is largely not very technical. The views of the Sawatch from the top of Henry Mountain are difficult to top. Access: This hike begins by following a trail up from Lamphier Lake. Just west of the lake, the trail becomes increasingly defined. The trail leads right up to the northern flanks of Square Top, which can be easily summited from there. Then, head back down and follow the ridge and occasional trail to Henry. Retrace your tracks down, and then go either east or west around the summit block of Square Top. On the south side of square top, you will encounter a ridge that has the most technical climbing of the route. It is class 3 in most cases, sometimes class 4. This section does not last too long. Keep following the ridge as it curves eastward to the summit of Fossil Mountain. Go over the other side of Fossil and find the least steep path back down to the lake. This part is mostly scree and talus. Trip Reports:August 2014 Maps:Google Map
Hiking Ideas
There is SO much information in this hiking guide! Some people become overwhelmed. Below, I have listed the best hikes in Crested Butte by category which may be helpful to you in selecting a good hike based. Check out the best hikes below:
Some people may wish to do a through hike and want to use a shuttle service. Others may not have cars quite good enough to get them to their desired trailhead (often West Maroon or Rustler’s Gulch). For whatever reason, you may want a ride. Consider going with Dolly’s Mountain Shuttle. Also, if you already have a car, but need it to be somewhere else at the end of your hike consider Maroon Bells Shuttles.
Aside from skiing, biking, and all outdoorsy things,Brittany Walker Konsella also loves smiles and chocolate 🙂 Even though she excels at higher level math and chemistry, she still confuses left from right. Find out more about Brittany!
Latest posts by Brittany Walker Konsella (see all)
The Crested Butte hiking guide is your most comprehensive guide to hiking in Crested Butte, Colorado complete with descriptions, mileage, time-estimates and maps.